Making of Mini Gabbu – The Crochet Labrador

An amigurumi which had a mind of its own, just like his namesake
I wanted to have this post in time for Gabbu’s second birthday which was on October 12th. But well life happens and I got really busy. But it is never too late right. So here it is 🙂

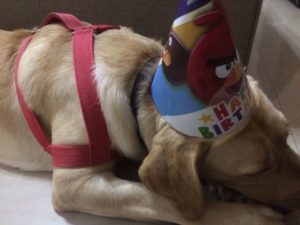
Gabbu @ his birthday party
Gabbu is the Labrador of my friend Renu from work. She was leaving for US in January and missed having Gabbu with her. So thought of making a crochet labrador to keep her company and so Mini Gabbu was born.
She was so happy to get this. She actually thought it was store-bought. I doubt if I would get a better compliment than that.
Making this was very difficult compared to any other crochet project that I have worked on. The pattern is simple enough, but it involved
- Getting it exactly similar to what I had in mind
- Stuffing it
- Stitching it up
- Finding artificial eyes and locating a position for it.
- Frogging and redoing ears and tail thrice

There were times when I just wanted to give up and throw it all away. But I kept going and the final result made everyone happy 🙂
Most important live lesson I learnt from making Mini-Gabbu:
All good things in life most often has a very difficult path. And at times we would feel like quitting, shouting, throwing it all away and cry. But if we keep at it despite all the tough situations.. The end result will be so beautiful that we would never regret the difficulties we have passed through.
The Crochet Labrador:-
Pattern available @: The Labrador Site by Lucy
Hook: 2.5mm [2.0mm might also work with this specific yarn]
Yarn: Anchor Knitting Cotton – Pale Yellow (Shade No. 293 ) [2 nos] and Black [1 nos] – 50gm each ball
Other resources:
- Fibre Fill from Pradhan Embroidery
- Buttons [Brown] from Itsy Bitsy
- Silicon glue

Other Details:-
Altered Ear Pattern
- crochet a magic circle
- ch 4 [row 1]
- ch in each row till 7th row [row 2 – 7]
- increase in row 8, by 2 sc in each st [row 8]
- ch in each row till 15th row [row 9 – 15]
- increase in row 16, by 2 sc in each st [row 16]
- ch in each row till 23rd row [row 17 – 23]
- increase in row 24, by 2 sc in each st [row 24]
- continue with sc in the subsequent rows till you get the required length
Note: I did not stuff the ears. I left it as it is.

Filling Tip
When you fill in with fiber fill, do not squish it up and push it in. This will create lumps and will not look nice. Instead fill it in by keeping the fiber fill fluffy itself.
Eyes
I really didn’t like the doll eyes which were available at the store. After a long search I ended up finding brown buttons. But problem with this is that there is a hole in the middle which will show the pale yellow yarn behind. So I ended up colouring the back of a bit of washi tape black, and sticking it behind the button. This covers up the hole and makes it look better. I stuck the eye to the head using silicon glue.

Stitching up:-
This is another difficult task if you are not used to it. I suggest using the same yarn for stitching up the different parts of the body. Using a different type of yarn may cut through your existing stitches with time. Using same yarn and same colour will help to hide the stitches too.
And that is it. Do post links if you had tried or are trying something similar.
Oh and here are some more pictures of Gabbu from last year. 🙂

All geared up for first birthday

Tired from partying 🙂

Don’t fight! Come play with me!

Time for a cosy nap! you can get your own pillow !!
Note: This page is not a clue.


Buy High Quality Fabric in India: EPI and PPI for Quality and Profit
https://chowdaryspinners.com/buy-high-quality-fabric-in-india/
Buy Yarn in India, Yarn Exporter/ Importer, Slub Yarn & Hank Yarn
Learn how smart EPI and PPI selection boosts fabric quality and profits. Chowdary Spinners shares expert tips for smarter textile decisions
Online Hank Yarn in India: Uses & Advantages in Textiles
https://chowdaryspinners.com/online-hank-yarn-in-india/
Buy Yarn in India, Yarn Exporter/ Importer, Slub Yarn & Hank Yarn
Explore why hank yarn remains a top choice in textile manufacturing. Learn its benefits, applications,& value from Chowdary Spinners experts.
Aww so sweet!!
Aww. I want a stuffed pup too. 😭 But I can’t decide who is more cuter. Doggo or Mini doggo.
I know right!!
Hehe
Awwww that was so sweet of you.
Thankyou!!
Awesome work Vinlite
Thankyou Shahbaz!!